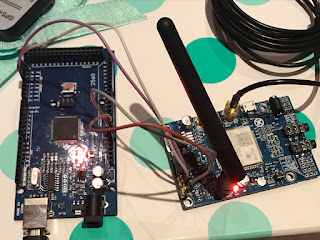
The first step is to compile the following code in Arduino, this code makes the bridge between your computer and the shield.
You can either use hyperterminal(http://www.techrepublic.com/article/step-by-step-how-to-use-the-hyperterminal-tool-to-troubleshoot-modem-problems/) or the command test online(http://m2msupport.net/m2msupport/module-tester/). After you understand the AT commands and found out which command works for you, you can then program on Arduino.
Arduino and Shield SIM808
Arduino Uno
Generally the processor on the arduino board will connect to the GPRS modem. In order to use the AT Command Tester, the computer should connect to the GPRS modem through the arduino’s USB interface. The following sketch will set that up on the Arduino Uno boards.Download the sketch through the Arduino IDE. Please verify the baud rate setting in the sketch.
——————————————————————————————
//Serial Relay – Arduino will patch a
//serial link between the computer and the GPRS Shield
//at 19200 bps 8-N-1
//Computer is connected to Hardware UART
//GPRS Shield is connected to the Software UART
//Serial Relay – Arduino will patch a
//serial link between the computer and the GPRS Shield
//at 19200 bps 8-N-1
//Computer is connected to Hardware UART
//GPRS Shield is connected to the Software UART
#include
SoftwareSerial mySerial(2,3);
void setup()
{
Serial.begin(19200);
//Serial.println(“Begin”);
mySerial.begin(19200);
{
Serial.begin(19200);
//Serial.println(“Begin”);
mySerial.begin(19200);
}
void loop()
{
if (mySerial.available())
Serial.write(mySerial.read());
if (Serial.available())
mySerial.write(Serial.read());
{
if (mySerial.available())
Serial.write(mySerial.read());
if (Serial.available())
mySerial.write(Serial.read());
}
Arduino Leonardo, Arduino Mega 2560, Auduino Mega ADK
Use the following sketch for other Arduino boards. Please check the baud rate of the modem shield.
——————————————————————————————
//Serial Relay – Arduino will patch a
//serial link between the computer and the GPRS Shield
//at 19200 bps 8-N-1
//Computer is connected to Hardware UART
//GPRS Shield is connected to the Software UART
//Serial Relay – Arduino will patch a
//serial link between the computer and the GPRS Shield
//at 19200 bps 8-N-1
//Computer is connected to Hardware UART
//GPRS Shield is connected to the Software UART
#include
SoftwareSerial mySerial(10,11);
void setup()
{
Serial.begin(19200);
{
Serial.begin(19200);
while (!Serial) {
; // wait for serial port to connect. Needed for Leonardo only
}
//Serial.println(“Begin”);
mySerial.begin(19200);
; // wait for serial port to connect. Needed for Leonardo only
}
//Serial.println(“Begin”);
mySerial.begin(19200);
}
void loop()
{
if (mySerial.available())
Serial.write(mySerial.read());
if (Serial.available())
mySerial.write(Serial.read());
{
if (mySerial.available())
Serial.write(mySerial.read());
if (Serial.available())
mySerial.write(Serial.read());
}

No comments:
Post a Comment